

Key: HXK-CTF-HWU
About this Custom Cook
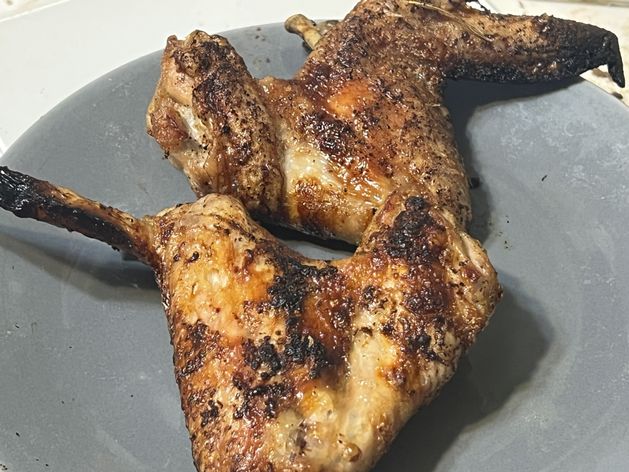
Ultra Crispy Wings
These are the absolute crispiest, tastiest, non-fried wings I have ever made. Evenly and beautifully browned.
Please note: This is not a fast cook, takes about 1/2 hour, and during the last 15-20 minutes, there will be some smoke, so use this cook ONLY if you have an exhaust fan near your Brava.
I strongly recommend using large size whole wings for this cook.
You will need to manually flip the wings at least a couple of times. You will be prompted to do so.
You can enjoy the wings as is or add your favorite wing sauces to them (sauces and sauces with sugar in them should only be added after the cook completes as described in the instructions.
WARNING:
************
Do not attempt to use this cook with wings that have any kind of brine/solution added to them.
You will need the glass tray and a 1/4 sheet size cookie metal wire cooling rack for this cook. The racks are available on Amazon, the current price is about $6.
INGREDIENTS:
Ingredients needed for this cook are GHEE, salt and pepper. And of course, defrosted whole wings that DO NOT have any kind of brine/solution of any kind added to them. I have only done this cook with whole wings but cut up wings should work well. As far as sauces, seasonings go, the choice is yours...
I strongly recommend using large size whole wings for this cook. You can do a small number of wings, or the entire tray filled up to capacity. Unlike most Brava cooks, the actual number of wings is not critical for this cook. The zones do not need to be filled fully. You can place them anywhere on the rack which is sitting on the tray. I may post a custom cook for small wings in the future.
TIP: If you want to add more wings, simply remove the wing tips off your wings. Or use cut up wings. This should free up enough space for several more wings on the tray.
DO NOT overlap the wings on top of each other when placing them on the tray. Leave space between each wing so they are not touching each other. Do not use SMALL wings, as they will likely be overcooked with this cook. Again, I may post a custom cook for small wings in the future.
I do suggest you 'flatten' the wing tip which is thin otherwise it may burn a bit, You will likely need to twist the wing tip firmly at the joing to flatten it out.
PREPARATION:
Place the cooling rack on your glass tray. Pat your wings dry with paper towels. Place the wings on the wire rack.
Slide the tray into your Brava, lower level.
Press START.
In a bowl that can easily accommodate all the wings, add a small amount of GHEE. Add in some salt and pepper. If you have other dry ingredients you want to add that DO NOT have sugar in them like garlic powder, onion powder, paprika, etc., you can also add them to the mixture at this time.
After about 30 minutes, the cook will pause. Carefully removed the tray from your Brava using an appropriate heat resistant glove. The tray and rack and wings will be warm.
Place your wings in the bowl and mix until they are evenly coated with the mixture you prepared. Then place the wings back on the rack and slide the tray back into the lower level of your Brava. Close the door and press start.
WARNING: DO NOT add any other type of sauce at this time, especially any type of sauce that has sugar in it. You can add your favorite wing sauce to them after the cook completes. See the instructions below.
After about 10 minutes, your Brava will PAUSE.
Check your wings. If they are nicely cooked, remove and add your favorite sauce (see below).
Otherwise using heat resistant gloves to steady the tray, use tongs to carefully flip the wings over, then restart the cook by pressing the green start button. REMEMBER, the tray, rack, interior of your Brava and wings will be quite hot.
After another 10 minutes, your Brava will PAUSE.
Check your wings. If they are nicely cooked, remove and then finish them with your favorite sauce (see below)
IF more cook time is need, flip the wings over and restart the cook by pressing the start button.
At this point, you will be prompted to check your wings and flip your wings periodically every 5 minutes for up to 3 more times. This step ensures you wings will be cooked evenly and will not be overcooked.
Coating Your Wings With A Sauce AFTER The Cook Completes:
Pour your favorite sauce into a large bowl.
Transfer your wings to the bowl.
Using tongs, toss wings in sauce until evenly coated.
Serve and enjoy the BEST wings ever!
Cleaning The Glass Tray:
The tray will look pretty messy after the cook completes. But don't worry, it is actually very easy to clean!
Allow it to cool completely. Then place a few drops of Dawn Platinium Dish Soap (or an equivalent quality dish soap) on the tray. Fill with water and let it soak overnight. In the morning, everything will come off easily and quickly. Wash with warm, soapy water and a sponge.